Goldenset Preparation and Assignment
Contents
Goldenset Preparation and Assignment#
PART 1: IDENTIFY AND EXPORT COMPLETED CSE PROJECTS#
Check the IIB-CSE-PROJECT-TRACKER.xlsx file to identify CSE batches ready to merge their respective CSE projects. Projects are ready to merge when ALL indexers have completed their projects for the batch. CSE Projects circled below are ready to merge.
---

```{figure} ../images/Picture1.png
---
height: 400px
name: spreadsheet-fig
---
IIB-CSE-PROJECT-TRACKER.xlsx
In CSE, open each IIB indexer’s completed CSE project, one at a time.

Fig. 1 CSE Projects#
In the open CSE project, go to the ‘Documents’ tab.
Fig. 2 Add Caption#
Select the down-arrow icon circled below, and click on ‘COGX (x docs) (x = the number of docs in the CSE project).
Fig. 3 Add Caption#
Save to the AnnotationData repository, in ‘Cogito-SAMPLE-HI-INDEXER-CSE-exports’ directory.
Note
ONLY ONE BATCH (project set) should be in this directory when you start the merge code!!
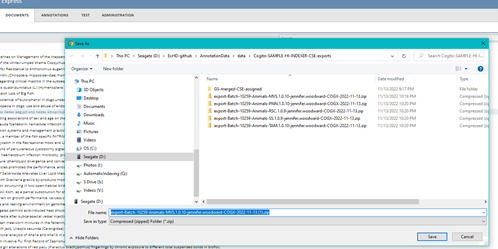
Fig. 4 Add Caption#
Repeat for each CSE project for the batch, until all COMPLETED files are downloaded
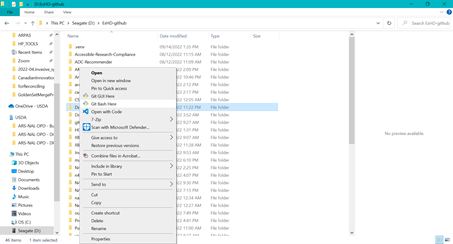
Fig. 5 Add Caption#
a.	In the bash window.
  i.   Type git pull to ensure your branch is up to date (Also, git status to see if you have an local changes that need to be committed.)
  ii.  Check branches if needed git branch
  iii. Create a new branch if needed git branch golden_cse
  iv.  Switch to a golden set branch for this task git checkout golden_cse
  v.   Note the prompt in the GitBash window shows you are no longer in the main branch.
  vi.  Type in   python -m idlelib to launch Idle (python default editor).
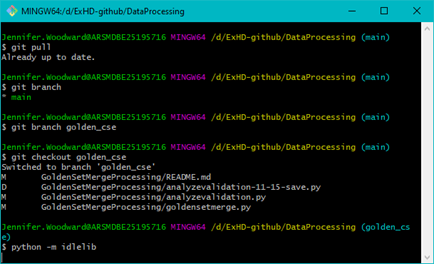
Fig. 6 Add Caption#
vii. Keep this bash window open.
While on the branch (GitBash window still up), in the python shell that pops up, select ‘file > open’
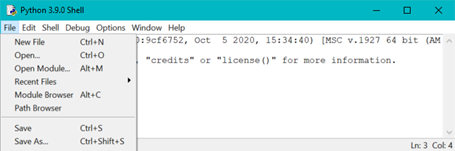
Fig. 7 Add Caption#
While on the branch (GitBash window still up), from the Idle Shell you just opened, click ‘File’ to open the python file ~ \DataProcessing\GoldenSetMergeProcessing\goldensetmerge.py
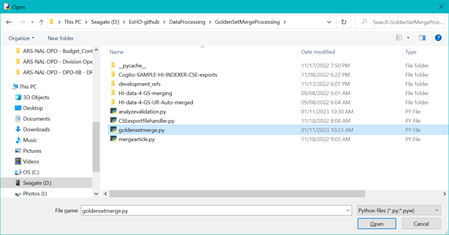
Fig. 8 Add Caption#
In the open goldensetmerge.py python file, select Run >Run Module… it will automatically find the indexers CSE project files you previously exported to
~\AnnotationData\data\Cogito-SAMPLE-HI-INDEXER-CSE-exports
CAUTION: At this point, you should have ONLY one Batch represented with the exported zip files. So, if 5 indexers completed individual files, then you should have ONLY five zip files in this directory before you run the code (directory image not shown here). The code will provide output to monitor the process in the GitBash, and in the python shell. Keep them all up, and do not close them! Once the code is running, there is nothing you need to do until it completes.
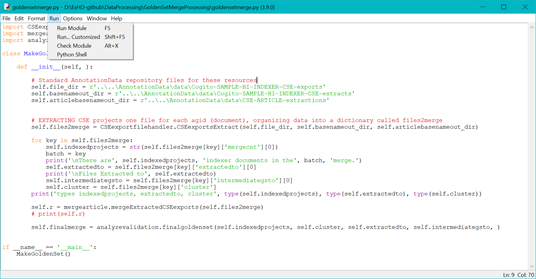
Fig. 9 Add Caption#
FIND THE CSE golden set articles in a zip file, usually containing about 60 +/- articles that were in the individual CSE projects. YOU NEED THE CORRECT FILE FOR UPLOAD TO CSE. The zipped file in the subdirectory for EXTRACTED articles for CSE goldenset project creation. NOTE this is very deep in the file structure. THIS will be the file for upload into the CSE GOLDENSET files are NOW READY for CSE! ~\AnnotationData\data\CSE-ARTICLE-extractions\ zips4CSEprojects\ Batch-ddddd-Food_and_Nutrition-GS.zip. See an example zip file and which directory to find it, below.
This step is included here just to confirm the zip file exists. You will use this in the CSE project creation step in PART 3. PLEASE ASK JENNIFER IF THIS IS UNCLEAR.
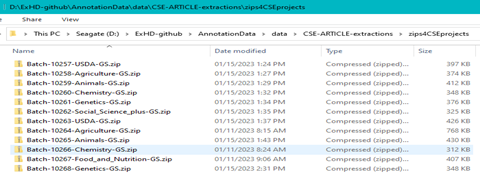
Fig. 10 Add Caption#
The indexer zip exports will automatically be moved to the sub-directory ~/AnnotationData/data/Cogito-SAMPLE-HI-INDEXER-CSE-exports/GS-merged-CSE-assigned once the merge is completed.

Fig. 11 Add Caption#
Only zip files still needing to be merged should be stored directly in GS-merged-CSE-assigned directory, i.e. only ONE BATCH, or set, of CSE project files should be in this directory when you start the merge code.
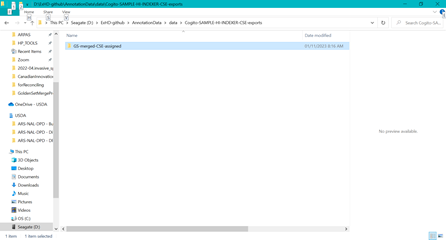
Fig. 12 Add Caption#
IF YOU HAVE ANY PROBLEMS AT ALL RUNNING THE CODE, CONTACT JENNIFER IMMEDIATELY BEFORE YOU ATTEMPT TO ALTER THE CODE.
PART 2: RUN THE GOLDEN SET MERGE CODE AS SHOWN#
You should have both the AnnotationData and the DataProcessing repositories cloned to your local PC at the same level, and up to date (pull first).
The project configuration for your files should be: –myGithubs —-AnnotationData —-DataProcessing
Open up a GitBash window in your local DataProcessing repository. (Assumes you have cloned this repository to your local machine, and have set up GitBash. If you have not, please do so.) Right click on the DataProcessing folder, select ‘GitBash Here’
Note
IF YOU HAVE ANY PROBLEMS AT ALL RUNNING THE CODE, CONTACT JENNIFER IMMEDIATELY BEFORE YOU ATTEMPT TO ALTER THE CODE.
PART 3: CREATE and ASSIGN A NEW GOLDEN SET CSE PROJECT#
Go to CSE, log in, and open the current NALT_ONLY_PROJECT_TEMPLATE_2022.
fig. 14 fig. 15
Go to the pull down menu on the upper right, and select ‘Project backup…’. Select the recent November 13 update to NALT, and click the restore (arrow curving to the right) icon, circled below.
fig. 16
Enter the information in the proper format for the new CSE golden set project, as shown. The project will take several minutes to be generated.
fig. 17
Monitor progress, and wait for the creation process to complete. It may take up to 15 minutes +/-.
fig. 18 fig. 19
Once completed, go to the ‘Home’ tab, and OPEN the new project. YOU MUST DO THIS STEP SO YOU ARE NOT UPLOADING DOCUMENTS TO THE TEMPLATE PROJECT. Double check that you have opened the new project before proceeding.
fig. 20 fig. 21
Go to the ‘Documents’ tab, and click ‘ADD DOCUMENTS’.
fig. 22
Select ‘Choose File’.
fig. 23
Select the zip file you just created, and then click ‘Open’ on the file manager text box.
fig. 24
Double check the filename and format, and click ‘ADD’, the files should load quickly.
fig. 25 fig. 26
Once it is complete, go to the ‘Documents’ tab, and check that the documents loaded correctly, the correct number of documents, and that they are displaying properly.
Assign the new golden set CSE project to the Golden_Review_Logon account. Go to the ‘Administration’ tab, select the Golden_Review_Logon account, and then select the ‘+’ in the right side of the page.
fig. 27
Select the pull-down menu to find the new project and select it. Make the ‘Role’ and Editor and hit the ‘OK’ button to the right of the ‘Editor’ box. GO TO THE CENTER OF THE GUI, and HIT THE “SAVE” button! This assignment will NOT be saved if you do not select the ‘Save’ button once you have made these selections.
fig. 28
Once the CSE Goldenset project is complete, and you have verified that the documents look and annotations look correct; DELETE EACH of the individual indexer CSE projects for that batch number. If there is a prompt to remove the backup, select it, then CONFIRM. Do not delete more than two at a time to avoid memory errors from the server.
fig. 29 fig. 30 fig. 31 fig. 32